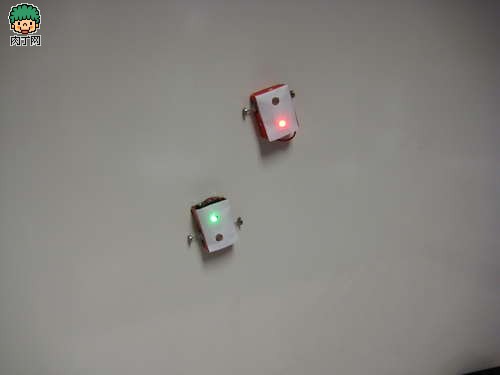
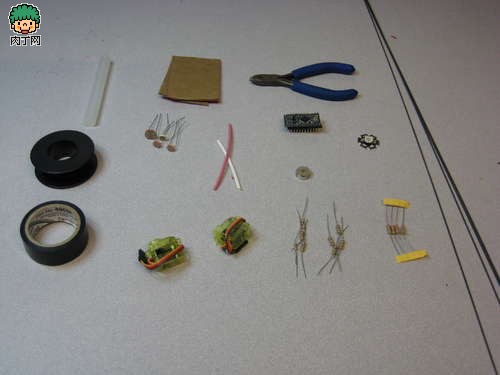
Want to get rid of the shackles of gravity? Want to practice parkour on the vertical wall? - Don't look at me with adoring eyes, even though I am flying and walking, the invincible cute and exquisite Wallbots! Of course, I don't mind if you call me. Stage Name: [Spiderman] This article refers to the address: http:// Climbing up and down the wall is a god horse?! Don't panic, neither a gecko nor a mutant spider, they are cute Wallbots - robots that can traverse on vertical surfaces. Want to know how to make it? Well, look down~ Small W can be moved on any metal-containing wall, including elevators, whiteboards, refrigerators, metal doors. The small W is also equipped with several light sensors through which simple interactions can be made. Three modes to choose from, converted by light sensors: red goes fast, approaching obstacles (such as human hands or small W brothers and sisters); green goes slow, away from obstacles; yellow goes the slowest, Stops completely when an object is detected. 1 Tools and materials ◠Some hard lines that are not easy to bend ◠Insulating tape ◠Line ◠Hardboard ◠glue stick ◠Hot glue gun ◠Scissors ◠Cutting pliers (the one of the strands) ○ 2.2K ohmic resistance *4 ○ 10K ohm resistor ○ 100 ohm resistor ○ Arduino Mini (microcontroller) ○ Servo motor*2 ○ Magnet piece *6 ○ 1 RGB LED light ○ 1 light battery 2 Getting Started for Servo Motor Continuous Operation ◠Open the shell that holds it, and make a simple modification to each servo to get the continuous rotation we need. Open the shell first. ◠Cut off the shell that prevents the rotation so that the potentiometer can always get a continuous signal. ◠This black part is used to stop it after it has been rotated 180 degrees. See no? Two black plastic pieces. ◠Remove the gear ◠Cut the lines on the black shell (the next big step will tell you how to deal with them). ◠Cut off the small plastic piece that keeps rotating continuously. 3 Advanced steps for continuously rotating the servo motor ◠Now, the potentiometer has been successfully tuned ~(≧▽≦)/~, she has been collecting continuous signals. ◠Cut the red, green, and yellow lines from the black shell (this should be done in the previous step). ◠Weld a 2.2K resistor between the green and yellow wires ◠Weld a 2.2K resistor between the red and yellow lines 4 reverse setting ◠Under the same analog signal, the steering of the servo is generally the same. They are symmetrically installed on a small W, but what to do with a reverse? It can be solved both in hardware and software (I use hardware, because I am a lazy code, fall!). ◠Cut the red and blue wires from the motor to the motor board. ◠Solder the red line to the blue line, then the blue line to the red line (dizzy? Actually, it crosses like the picture). 5 assembly motor ◠This step is easy! Tweak the wire as much as possible into the servo housing and assemble the gear. But pinch, after I added the resistor, the previous shell was not suitable, so I wrapped them together with insulating tape. 6 gears ◠How to attach it? The hot glue I use, in fact, any sticky thing can be made, first cut two 1 inch long hard wire. ◠Glue each wire to the gear on the top of the servo. The line is halfway, the dew is half out! ◠Stick 3 disks at the end of each line. The disk must also be centered! 7 The servo machine is connected to the single chip microcomputer. ◠I use PIN 9 and PIN 10 to drive the motor. ◠Pin 9 > Orange line of servo 1. ◠Pin 10 > Orange line of servo 2 ◠Ground > Black line of servo 1, 2 . ◠VCC > Red line of servo 1, 2. 8 connected to the photoresistor ◠Connect each photoresistor (light sensor) to the Arduino for a total of 4 sensors, left, right, front, and back. ◠Below each circuit diagram of the light sensor, one line of the sensor is connected to VCC; the other line is connected to a 10K and 100 ohm resistor. The 10K resistor is grounded and a 100 ohm resistor is connected to the input. The input of each sensor (green line) is connected to the analog port on the MINI (A0, A1, A2, A3). ◠My program is set up like this: Analog 0 > top sensor; Analog 1 > left sensor; Analog 2 > front sensor; Analog 3 > right sensor. 9 plus RGB LED lights ◠Connect each photoresistor (light sensor) to the Arduino for a total of 4 sensors, left, right, front, and back. ◠Do you want to put a resistor (about 200 ohms) between each port and the LED light? I don't have a sauce purple, because my LED light can withstand much higher voltage than the Arduino can provide, so it won't be burnt. . 10 Installing the battery ◠In fact, pinch, can provide 3-4V battery can be used, the lighter the better. I used a sparkfun lithium battery. Ground, then connect the high voltage directly to the VCC port of the Arduino. 11 on the program!! ◠This code is for the two servo motors to be driven based on the input values ​​of the four photosensors. There are several ways to exercise depending on the mode. Click here to get the code The red is the fastest, tending to the object (when the light sensor detects that the light is blocked); The blue is medium speed, facing away from the object (back to the black area); Yellow is the slowest and stops when an object is detected. ◠Xiao W and its siblings move on the wall by magnet wheels, which can turn left and turn right and forward; according to different modes, speed can be adjusted. ◠When the top sensor is blocked for more than 3 seconds, all sensors are automatically calibrated. 12 Don't let the little W streaking ◠Wear clothes for the small W. But before you must make sure the program can run, then you can tell which server is left and which is right. ◠Because the small W has to move vertically, the lighter the clothes, the better! The hard paper case I use, in fact, newspaper or light plastic can make it. ◠I glued the servo to the carton. The sensors are distributed around the front, back, left and right, and then reinforced with cardboard. In order to let the heat sensor and the gear stay comfortable inside, I cut some holes in the tailor. The top of the small W is actually. . . It is a piece of paper! Indoor LED Display is widely used in stadium, shopping mall, station, office and hotel for advertising with characteristics of high brightness, large viewing angle, high safety, long life span, light weight, fast installation and easy maintenance etc. Indoor Led Display can be mainly divided into mounted screen and pillared screen. General Equipment for Indoor Led Display: 1. Video processor with multiple signal channel, satisfying the switch of different perspectives from live broadcast, advertising image and on-scene interview; 2. Splicer a kind of high and new equipment dividing a complete image into several blocks to achieve a large dynamic screen with multiple ordinary video units; 3. DVI distributor used for multiple digital video output with one-way digital video input and multi-channel video output function, to display images of the same DVI signal source with multiple digital display terminal in multimedia application system. Indoor LED Display Indoor Led Display,Led Advertising Panel,Led Screen Wall,Led Curtain Wall Display Shenzhen Joy LED Display Co., Ltd. , https://www.joe-led.com