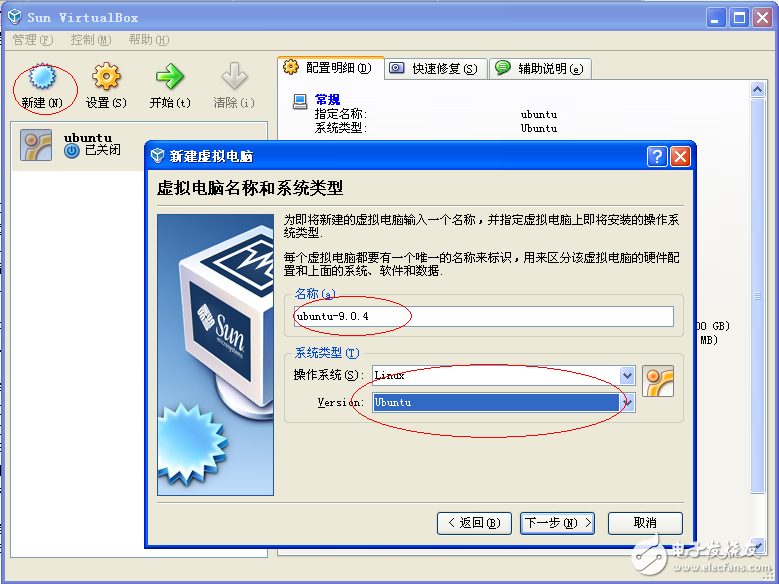
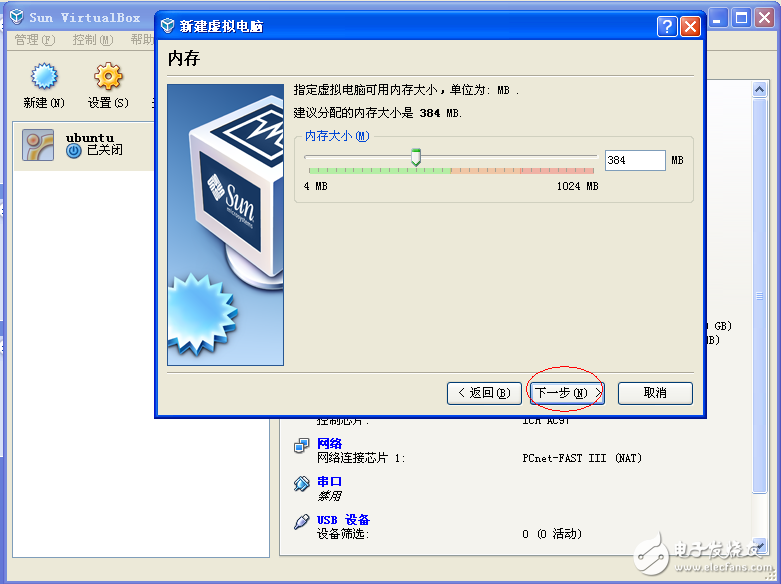
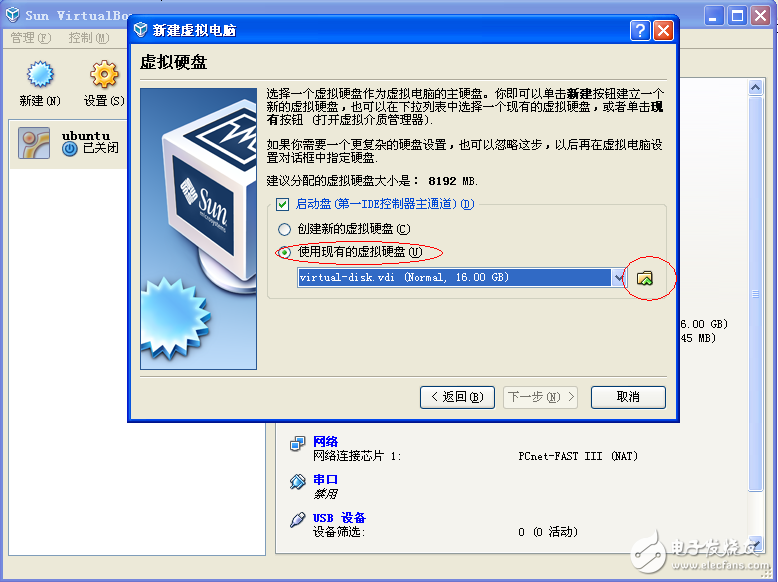
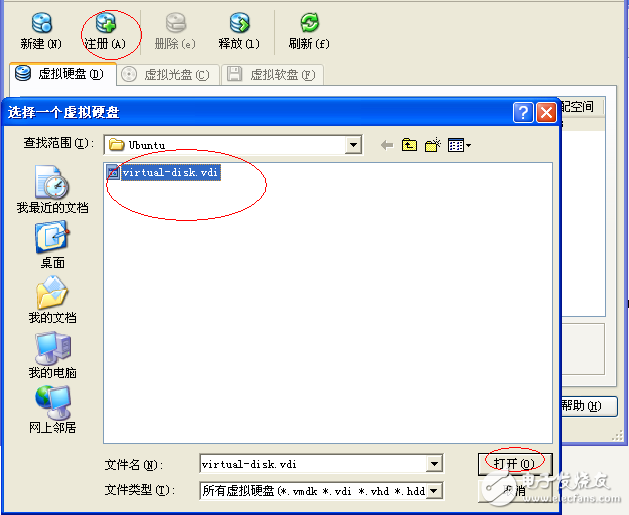
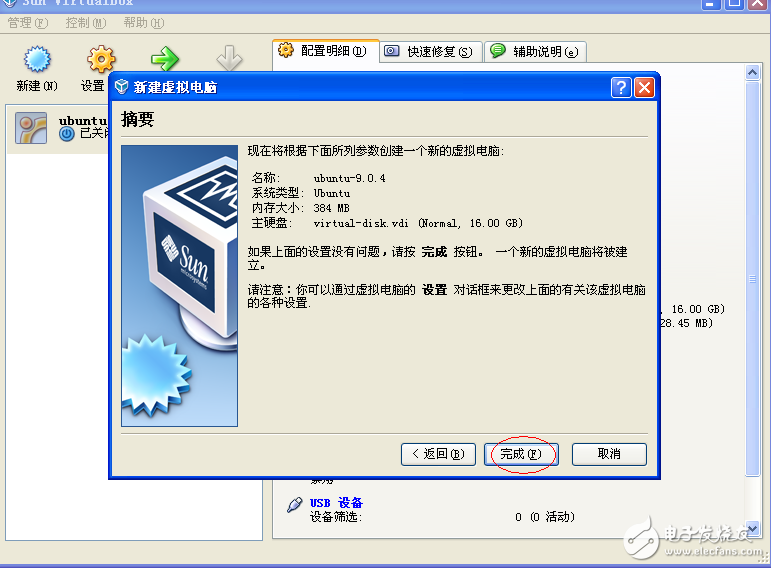
After spending two hours, I finally managed to set up this development platform. Now, I’ll take a moment to summarize everything and try it out as a note for future reference. The platform consists of three main components: a PC, a VirtualBox virtual machine, and an ARM development board. All three are connected to the same router and thus reside in the same network segment. This setup allows seamless communication between the PC, the virtual machine, and the development board, while still enabling internet access during development. A key prerequisite is knowing the IP address of your development board. The following analysis is based on the step-by-step build process outlined below. First, install a virtual machine on the PC Setting up a virtual machine on a PC is straightforward. I used Windows XP for this setup, but if you're running Windows 7, this guide can still serve as a reference. First, download the latest version of VirtualBox. It offers a simple and user-friendly interface, uses less memory, and has easy-to-configure network settings. The current latest version is 4.2.4, though if you’re not downloading the most recent one, you can check for updates via the Help menu after installation. Once downloaded, you'll see the VirtualBox installation icon. Clicking it will launch the installation wizard. You'll be greeted with the Oracle VM VirtualBox Setup Wizard. Click Next, then select "I accept" to proceed. If you skip this step, the next button will remain grayed out. Continue clicking Next until you reach the setup page where you can choose the installation directory by clicking Browse. Once you’ve selected your preferred folder, click OK and then Next to continue. By default, the installer creates shortcuts on the desktop and adds a quick launch item. You can choose to enable these options by checking the corresponding boxes before proceeding. The installation may take some time, as VirtualBox configures its own local network. Be patient during this process. Once installed, a shortcut for VirtualBox should appear on your desktop. Additionally, right-click on "My Network Places" (or "Network" depending on your OS) and select Properties. You’ll see a new network connection added—this is the virtual network card created by VirtualBox. By default, it uses NAT mode, meaning the virtual network card acts like a router, allowing the virtual machine to access the internet through your physical network card. At this point, the virtual machine software is fully installed. The next step is to install the Linux operating system inside it. Second, install Ubuntu in VirtualBox I chose Ubuntu 9.0.4 for this setup, but any more recent version would work just fine. It’s recommended to download the virtual hard disk format (VDI) to streamline the installation process. If you don’t have a pre-configured VDI file, you can create one manually, but this guide assumes you’re using a pre-downloaded VDI image. After downloading the Ubuntu ISO or VDI file, double-click the VirtualBox icon on your desktop to open the application. Before installing the OS, it's important to adjust the network settings. While NAT mode is simple, it can sometimes cause networking issues. For better performance, switch to Bridge mode. To do this, go to Settings > Network > Adapter 1, and change the "Attached to" option to "Bridged Adapter." Select your default network interface, ensure the cable is connected, and click OK. Now, let’s move on to the actual installation: 1. Click New to create a new virtual machine for Ubuntu. 2. Click Next and allocate around 384MB of RAM. 3. Choose the virtual hard disk image (in .vdi format) that you previously extracted. 4. Complete the setup and click Start. 5. Log in to the virtual machine. Username: root
Password: ********* (The username and password can be found in the downloaded file. Typically, the default username is 'root' and the password is left blank or provided in the documentation.) aluminum phone case,aluminum cell phone case,exclusive alloy protective case,aluminium alloy waterproof Dongguan Yingxin Technology Co., Ltd. , https://www.dgyingxintech.com